DLTK's Educational Activities
General Ideas for Involving Students in Bulletin Board Projects
Some bulletin board projects lend themselves well to involving all students. Others require only limited involvement by the kids. I've provided ideas for both levels of involvement in the projects section.
Projects requiring the work of all students are marked with

Projects which only need a few helping hands are marked with
![]()
Here are some ideas on how to organize  projects:
 Each week, have a different helping hand or student helper of the
week. That student can help complete
some of the displays for the next month's bulletin board.
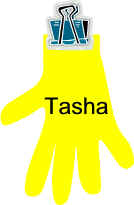
To start your helping hands system, trace and cut out hands from
different colors of construction paper. Write each
student's name on one hand. Shuffle them up and clip them
together with a binder clip. Hang the clip on a push
pin. Each week, take the hands down, put the top name on
the back and show the children who the next helping hand is.
Each week, have a different helping hand or student helper of the
week. That student can help complete
some of the displays for the next month's bulletin board.
To start your helping hands system, trace and cut out hands from
different colors of construction paper. Write each
student's name on one hand. Shuffle them up and clip them
together with a binder clip. Hang the clip on a push
pin. Each week, take the hands down, put the top name on
the back and show the children who the next helping hand is.
 A LONG time ago *grin*, my grade three teacher had four colored
recipe boxes in the back of the classroom. These boxes
contained 5 minute, 10 minute, 15 minute and 30 minute
projects. The recipe cards had a colored border around them
that matched the color of the box (she just glued a recipe card onto
a slightly larger piece of colored cardstock to create this
border). When a student was done their homework, the teacher
would tell them to go take a card from one of the boxes (she would
choose the box based on how much class time was left). The card
would give directions on where to get materials and what the project
was.
A LONG time ago *grin*, my grade three teacher had four colored
recipe boxes in the back of the classroom. These boxes
contained 5 minute, 10 minute, 15 minute and 30 minute
projects. The recipe cards had a colored border around them
that matched the color of the box (she just glued a recipe card onto
a slightly larger piece of colored cardstock to create this
border). When a student was done their homework, the teacher
would tell them to go take a card from one of the boxes (she would
choose the box based on how much class time was left). The card
would give directions on where to get materials and what the project
was.
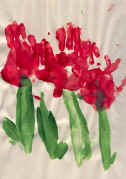
Create the basic bulletin board yourself, using your own or a past year's artwork. The work you put on the board provides a sample for the children to view when doing the project this year. Throughout the month, rotate in artwork created by this year's students. Over a two or three month period, make sure that each student has had something displayed on the bulletin board. Swap as often as needed to accomplish this goal.